OIDC Authentication
BookLogr supports OpenID Connect (OIDC) authentication for account sign-in. To enable it, you will need to set up credentials and apply them to your container environment.
Prerequisites
Before enabling OIDC, you must configure a new client application in your identity provider. While the specifics of this setup vary from provider to provider, the general approach should be the same.
-
Create a Client Application
- Protocol:
OpenID Connect - Client Type/Authentication:
Confidential(Requires a Client Secret) - Grant Type:
Authorization Code - PKCE: Disable if possible (it is not used)
- Protocol:
-
Configure Redirect URIs The Valid Redirect URIs must include the exact path to the frontend's callback route:
http://{your-domain-or-ip-of-web}/callback
Replace {your-domain-or-ip-of-web} with the user-facing domain name or IP of your booklogr-web server/container.
Example Configuration
Keycloak Example
Keycloak Setup
-
Create Client: Navigate to Clients -> Create client.
- Client type:
OpenID Connect - Client ID:
booklogr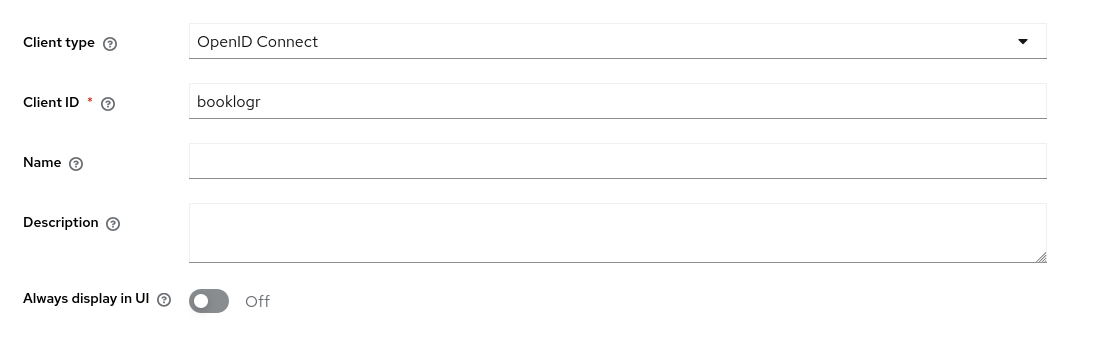
- Client type:
-
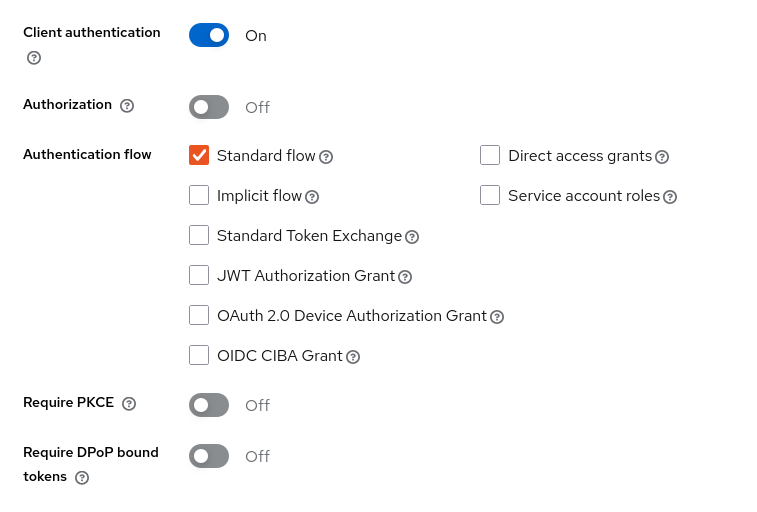
Capability Config:
- Client Authentication:
On - Authorization:
Off. - Standard Flow:
Enabled. - Require PKCE:
Off.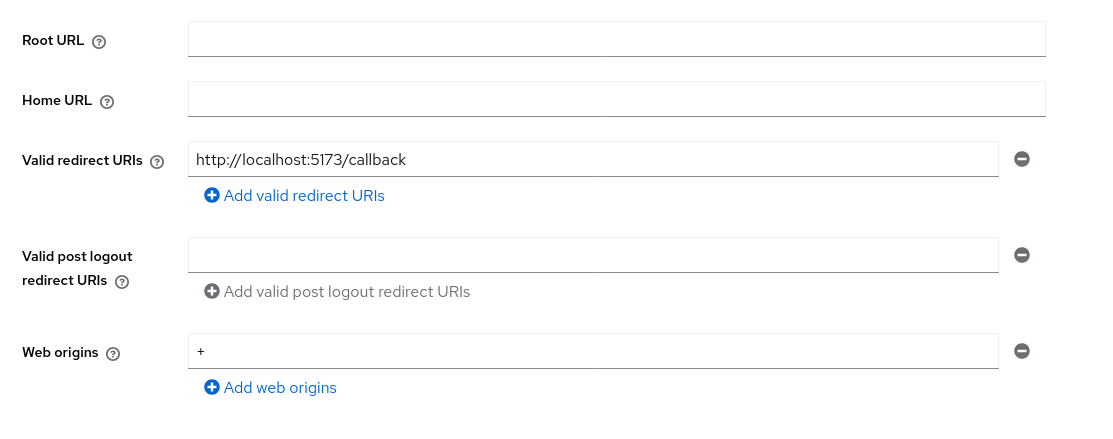
- Client Authentication:
-
Login Settings:
- Valid Redirect URIs:
http://{your-domain-or-ip-of-web}/callback - Web Origins:
+.
- Valid Redirect URIs:
-
Credentials:
- Navigate to the Credentials tab to copy your Client Secret.
Pocket ID Example
Pocket ID Setup
-
Create Client: Go to Administration -> OIDC Clients -> Add OIDC Client.
- Name:
booklogr - Callback URLs:
http://localhost:5173/callback - Public Client:
Disabled - PKCE:
Disabled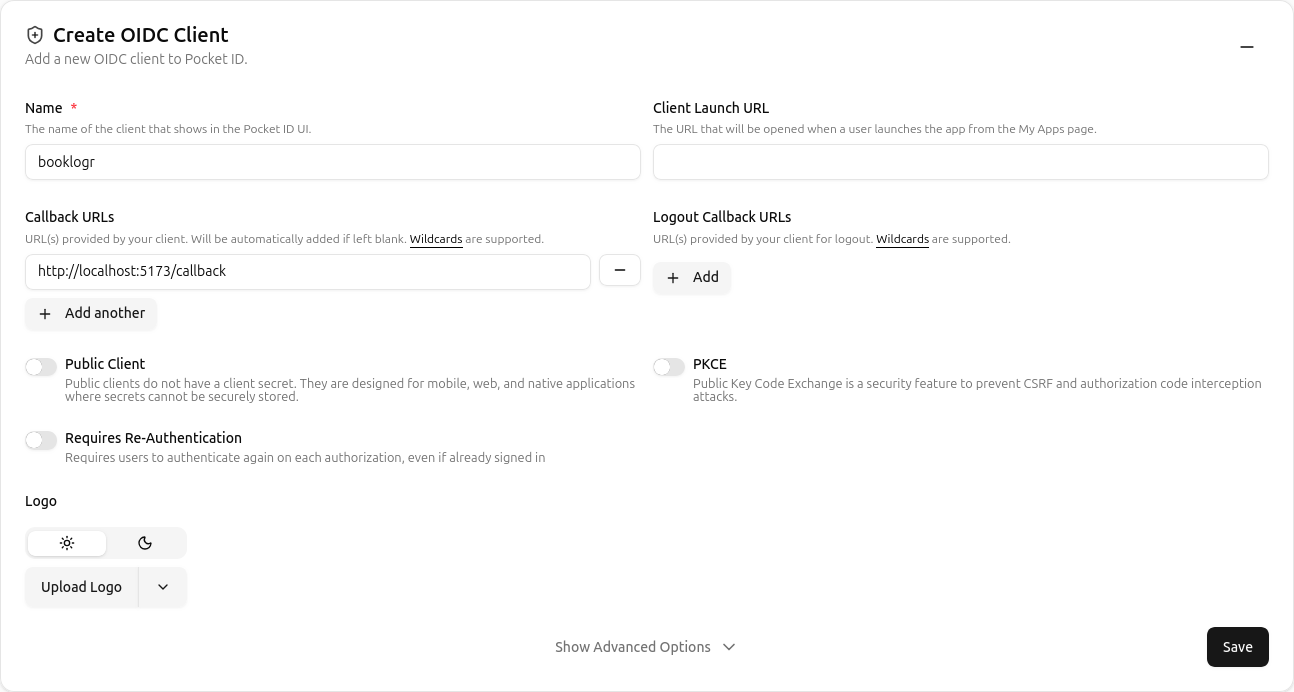
- Name:
-
Retrieve Credentials: After saving, copy the Client ID and Client Secret from the client details page.
By default, Pocket ID does not send the necessary CORS headers for browser-based discovery. If you see a "Cross-Origin Request Blocked" error in your browser console, you must configure your reverse proxy (like Traefik or Nginx) to inject these headers.
Traefik Configuration Example
Add these labels to your Pocket ID service in your docker-compose.yml:
labels:
  - "traefik.http.middlewares.pocketid-cors.headers.accesscontrolalloworiginlist=*"
  - "traefik.http.middlewares.pocketid-cors.headers.accesscontrolallowmethods=GET,OPTIONS,POST"
  - "traefik.http.middlewares.pocketid-cors.headers.accesscontrolallowheaders=*"
  - "traefik.http.routers.pocketid.middlewares=pocketid-cors"
Ensure the APP_URL in your Pocket ID environment variables matches the domain you are using to access it, and set TRUST_PROXY=true.
Authelia Example
Authelia Setup
This is a community provided setup for using Authelia with BookLogr. This is not officially supported.
See issue #110 for more information.
cors:
   endpoints:
   - 'authorization'
   - 'token'
   - 'userinfo'
   allowed_origins:
   - 'https://books.domain.com'
clients:
   - client_id: 'booklogr'
      client_name: 'Booklogr'
      client_secret: '$pbkdf2-sha512$i=600000$...your_encrypted_hash_here...'
      public: false
      authorization_policy: 'one_factor'
      redirect_uris:
         - 'https://books.domain.com/callback'
      scopes:
         - 'openid'
         - 'profile'
         - 'email'
      response_types:
         - 'code'
      grant_types:
         - 'authorization_code'
      token_endpoint_auth_method: 'client_secret_post'
Configure Environment Variables
See Environment variables for more information.
booklogr-api container
OIDC_CLIENT_ID=your_client_id
OIDC_CLIENT_SECRET=your_client_secret
OIDC_REDIRECT_URI=http://{your-domain-or-ip-of-web}/callback
OIDC_DISCOVERY_URL=http://{your-domain-or-ip-of-OIDC-provider}/.well-known/openid-configuration
booklogr-web container
BL_OIDC_AUTHORITY={your-domain-or-ip-of-OIDC-provider}
BL_OIDC_CLIENT_ID=your_client_id
If BL_OIDC_AUTHORITY and/or BL_OIDC_CLIENT_ID is empty or not set, the Sign in with OpenID Connect button will not appear on the login screen.